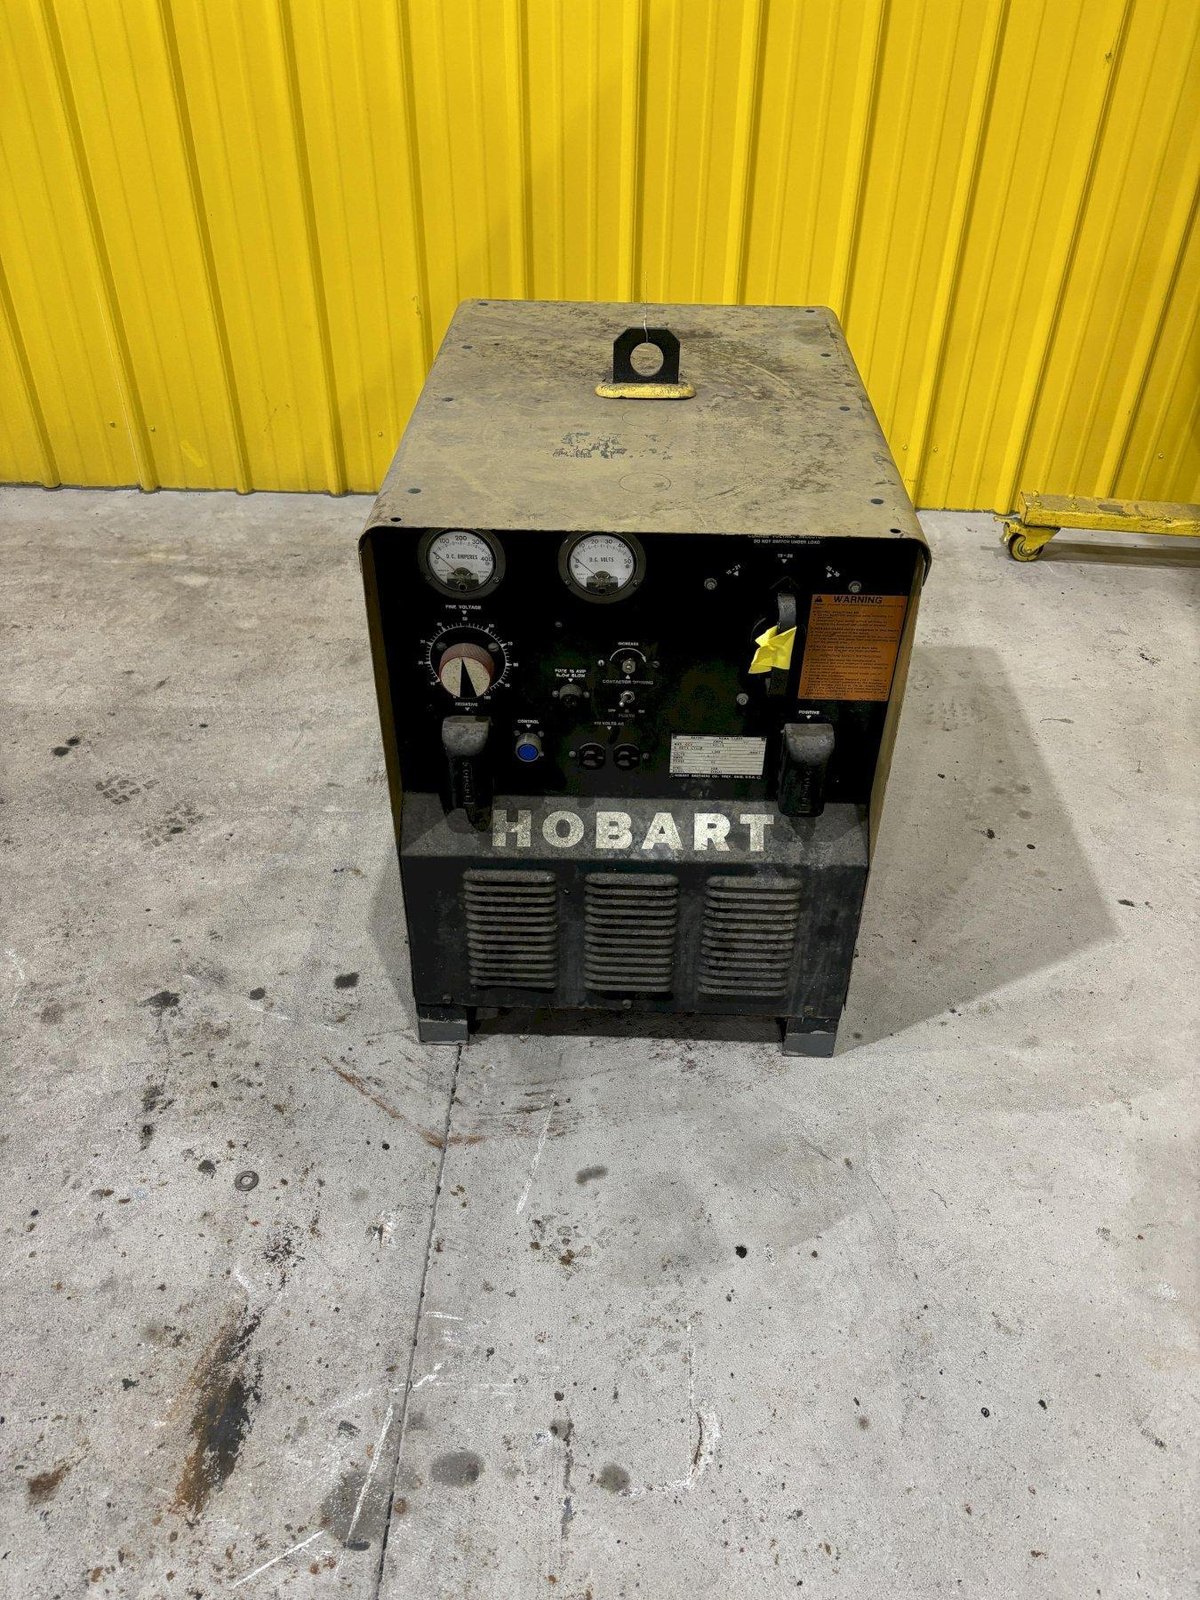
When your Hobart welder generator acts up, it’s more than just an inconvenience—it’s a disruption to your livelihood or your passion project. Whether you're on a remote job site or deep in your garage, reliable power and a consistent arc are non-negotiable. That's why mastering Maintenance & Troubleshooting for Hobart Welder Generators isn't just a good idea; it's essential for keeping your equipment running strong and avoiding costly downtime.
There’s a direct link between proactive care and peak performance. Skip the maintenance, and you're inviting trouble. Understand the common culprits behind poor performance, and you're halfway to solving most problems yourself, often preventing them entirely.
At a Glance: Key Takeaways for Your Hobart
- Regular checks prevent major headaches. Most issues stem from neglected basics like fuel, oil, and filters.
- Your manual is gold. Always consult your specific Hobart model’s manual for detailed specifications and service intervals.
- Safety first, always. Disconnect power, wear PPE, and ensure proper ventilation before any maintenance or troubleshooting.
- Listen to your machine. Unusual noises, smells, or performance changes are early warnings.
- Know when to call a pro. Don't tackle complex electrical or internal engine repairs if you're not qualified.
Why Proactive Care Makes All the Difference for Your Hobart
Think of your Hobart welder generator not just as a tool, but as a robust power plant on wheels. It’s designed to be tough, but even the toughest machines thrive on consistent, thoughtful care. Ignoring its needs leads to degraded performance, higher fuel consumption, and eventually, costly repairs or premature failure.
A well-maintained Hobart machine ensures you get the consistent, high-quality welds you expect, project after project. It extends the lifespan of your investment, maintains resale value, and most importantly, keeps you productive without unexpected interruptions. From the engine that hums reliably to the consistent current flowing to your electrode, every component plays a role. Gaining a deeper understanding of these machines can be incredibly beneficial; for a broad overview of their capabilities and features, you might want to review Understanding Hobart Welder Generators. This knowledge empowers you to not just fix problems, but to prevent them.
Your Essential Pre-Weld Checklist: Catching Issues Before They Start
Before you even think about striking an arc, a quick inspection can save you hours of frustration. This isn't just about identifying problems; it's about confirming everything is set up for optimal performance and safety.
Fuel System Fundamentals: Freshness and Flow
One of the most common reasons for poor engine performance or starting issues is a neglected fuel system.
- Fresh Fuel is Key: Gasoline degrades over time, especially if it contains ethanol. Stale fuel can gum up carburetors and fuel injectors. Always use fresh, clean fuel suitable for your engine, and consider a fuel stabilizer if storing your machine for more than a month.
- Check Fuel Level: Obvious, perhaps, but often overlooked. Ensure you have enough fuel for the job.
- Inspect Fuel Filter: A clogged fuel filter starves the engine of fuel, leading to sputtering or stalling. Replace it according to your manual’s schedule or if it appears dirty.
- Check Fuel Lines: Look for cracks, leaks, or kinks in the fuel lines. These can introduce air into the system or lead to dangerous fuel leaks.
Oil: The Lifeblood of Your Engine
Engine oil lubricates moving parts, reduces friction, and helps cool the engine. Incorrect oil levels or dirty oil are recipes for disaster.
- Check Oil Level: Ensure the oil is at the recommended level on the dipstick. Too little oil can cause catastrophic engine damage; too much can lead to smoking and other issues.
- Oil Quality and Type: Use the oil type and viscosity recommended in your Hobart manual. Different engines require different specifications.
- Oil Condition: Look at the oil's color and consistency. If it's dark, gritty, or smells burnt, it's time for a change.
Air Filter: Breathing Easy for Peak Power
An engine needs clean air to combust fuel efficiently. A dirty air filter chokes the engine, reducing power and increasing fuel consumption.
- Inspect for Dirt and Debris: Remove the air filter and hold it up to a light source. If you can't see light through it, it's clogged.
- Clean or Replace: Foam filters can often be cleaned with soap and water, then thoroughly dried and re-oiled (if applicable). Paper filters should be replaced when dirty. Never try to clean a paper filter with compressed air, as this can damage the filter media.
Spark Plugs: The Ignition Source
Healthy spark plugs are vital for reliable starting and smooth running.
- Inspect Condition: Remove the spark plug and check the electrodes. They should be clean and light brown. Black, oily, or fouled plugs indicate other engine problems.
- Check Gap: Ensure the spark plug gap is set correctly using a feeler gauge, as specified in your manual. An incorrect gap can lead to misfires.
- Tightness: Make sure the spark plug is properly tightened, but don't overtighten, which can damage the cylinder head.
Battery: Powering the Start
If your Hobart has an electric start, the battery is crucial.
- Terminal Inspection: Check for corrosion on battery terminals. Clean any buildup with a wire brush and a baking soda/water solution. Ensure connections are tight.
- Charge Level: If your machine struggles to turn over, the battery might be low. Charge it if necessary, especially after periods of inactivity.
Welding Leads and Gun: Your Connection to the Work
The welding circuit itself needs attention. Damage here directly impacts weld quality and safety.
- Lead Condition: Inspect your welding leads for cuts, abrasions, or exposed wires. Damaged leads are a shock hazard and can cause poor current flow.
- Connections: Ensure all lead connections (to the machine, to the electrode holder, and to the ground clamp) are clean and tight. Loose connections can generate heat and reduce efficiency.
- Electrode Holder/MIG Gun: Check for wear on the electrode holder, especially the jaws. For MIG guns, inspect the nozzle, contact tip, and liner for spatter buildup or wear. Replacing selecting the right welding consumables like these when they show wear is a simple way to maintain consistent arc quality.
Ground Clamp: Essential for a Stable Arc
A poor ground connection is a common cause of erratic arc performance and weak welds.
- Cleanliness: Ensure the ground clamp is clean and free of rust, paint, or grease. It needs a good metal-to-metal connection.
- Secure Connection: Clamp it firmly to clean, bare metal on the workpiece or work table, as close to the weld area as possible.
General Visual Inspection: The Overarching Scan
Take a moment to look at the machine as a whole.
- Leaks: Check for oil, fuel, or coolant leaks under and around the unit.
- Loose Hardware: Vibrate-prone machines can loosen nuts and bolts. Tighten any you find.
- Ventilation: Ensure air intake and exhaust vents are clear of obstructions, dust, or debris.
Deep Dive into Preventative Maintenance: Your Hobart's Long-Term Health Plan
Beyond the quick pre-weld check, a scheduled maintenance regimen keeps your Hobart in prime condition year after year. Adhering to these tasks extends its life and ensures reliable operation.
Engine Service Schedule: The Heart of the Machine
Follow your specific Hobart model’s manual for exact intervals, but here are general guidelines:
- Oil Changes: Typically every 50-100 hours of operation or at least once a year, whichever comes first. Always use the specified engine oil. This is perhaps the single most important maintenance task for engine longevity.
- Oil Filter Replacement (if applicable): Usually changed with every oil change.
- Air Filter Service: Inspect weekly or every 25 hours. Clean or replace as needed, more frequently in dusty environments.
- Fuel Filter Replacement: Annually or every 100-200 hours. This prevents contaminants from reaching the carburetor or fuel injectors.
- Spark Plug Inspection/Replacement: Inspect annually or every 100-300 hours. Replace if fouled or worn.
- Valve Clearance Adjustment: Less frequent, typically every 200-500 hours, depending on the engine. This is often best left to a qualified technician if you're not experienced.
Welding Generator Component Care: Maintaining the Arc Powerhouse
The electrical generation components also need attention.
- Generator Brushes and Commutator (for DC generators): Inspect these every 100-200 hours. Brushes wear down and need replacement. The commutator should be clean and smooth, without excessive scoring or carbon buildup. Keep these components free of dirt and metal dust.
- Output Terminals: Periodically clean the welding output terminals (positive, negative) to ensure good electrical contact. Tighten any loose connections.
- Cooling System: The generator needs to dissipate heat. Ensure cooling fins, fans, and vents are clean and unobstructed. Dust and debris can act as an insulating blanket, leading to overheating.
- Frame and Enclosure: Keep the exterior clean. Wipe down oil and grease spills. Address any rust spots promptly to prevent further corrosion.
Storage Best Practices: Protecting Your Investment
Whether it's for a weekend or an entire off-season, proper storage is crucial.
- Short-Term Storage (Less than 1 month): Ensure the fuel tank is full (to minimize condensation) and add fuel stabilizer. Run the engine for a few minutes to circulate the stabilized fuel.
- Long-Term Storage (More than 1 month):
- Fuel: Best practice is to completely drain the fuel tank and carburetor. Alternatively, fill the tank, add stabilizer, and run the engine until the stabilizer is through the system. Some manufacturers recommend draining regardless.
- Oil: Change the oil and filter before storage.
- Spark Plug: Remove the spark plug and add a small amount of engine oil (a teaspoon) into the cylinder, then slowly pull the recoil starter a few times to distribute it. Reinstall the plug. This prevents cylinder rust.
- Battery: Disconnect the battery and store it in a cool, dry place. A trickle charger can keep it topped off.
- Cleanliness: Clean the entire unit thoroughly before storage. Cover it to protect from dust and moisture.
Troubleshooting Common Hobart Welder Generator Issues: Your Problem-Solving Playbook
Even with the best maintenance, issues can arise. Here’s a structured approach to diagnosing and resolving common problems. Always prioritize safety: disconnect welding leads, turn off the engine, and wear appropriate personal protective equipment (PPE). Familiarizing yourself with essential generator safety practices is always a smart move.
"My Engine Won't Start or Starts Hard"
This is arguably the most frustrating problem. Here's a systematic approach:
- Is There Fuel?
- Empty Tank: Check fuel level.
- Stale Fuel: If it's been sitting for months, drain and refill with fresh fuel.
- Fuel Valve Closed: Ensure the fuel shut-off valve is open.
- Clogged Fuel Filter: Replace if dirty.
- Carburetor Issues: If fuel isn't reaching the carburetor (check fuel line connection), it might be clogged. This often requires cleaning or rebuilding.
- Is There Spark?
- Spark Plug Test: Remove the spark plug, reattach the plug wire, ground the plug's metal body against the engine block, and try to start. Look for a strong blue spark. No spark indicates an ignition system issue.
- Fouled Spark Plug: Clean or replace if the plug is wet or dirty.
- Ignition Coil/Module: If no spark and the plug is good, the ignition coil or module might be faulty. This typically requires professional diagnosis.
- Is There Air?
- Choke Position: Ensure the choke is set correctly for starting (closed when cold, open when warm).
- Clogged Air Filter: A severely clogged air filter can prevent starting. Clean or replace it.
- Is the Battery Charged (Electric Start)?
- Battery Terminals: Clean any corrosion and ensure tight connections.
- Battery Voltage: Test battery voltage. If low, charge or replace the battery.
- Starter Motor: If the engine cranks but doesn't turn over vigorously, the starter motor might be failing, or the battery is too weak.
- These are just a few starting points; for more detailed diagnostics, a guide on troubleshooting common small engine problems could provide further insights.
"No Welding Output or Weak Arc"
The engine runs, but your weld is weak, inconsistent, or non-existent.
- Machine Settings:
- Power Switch: Is the welding output switch engaged?
- Amperage/Voltage Settings: Are they set appropriately for your material and electrode?
- Process Selection: Is it set to the correct process (e.g., Stick, MIG, TIG)?
- Polarity: Is the polarity set correctly for your welding process and electrode?
- Welding Circuit Integrity:
- Welding Leads: Check for damaged leads, loose connections at the machine, electrode holder, or ground clamp.
- Ground Clamp: Ensure a clean, secure connection to bare metal on the workpiece, close to the weld area. This is a very common culprit for weak arcs.
- Consumables (MIG/TIG): For MIG, check contact tip, nozzle, and liner for spatter, wear, or blockages. For TIG, check tungsten integrity and gas flow.
- Generator Components:
- Circuit Breaker/Fuse: Check if a circuit breaker for the welding output has tripped or if a fuse has blown. Reset or replace.
- Generator Brushes (DC welders): Worn or dirty brushes can lead to intermittent or no output. Inspect, clean, or replace them.
- Exciters/Capacitors: Some generators use excitation systems or capacitors. If these fail, the generator won't produce power. This often requires professional diagnosis.
- Improving your foundational welding techniques can sometimes feel like a troubleshooting step itself, as proper technique can mask minor machine issues or highlight major ones.
"Engine Runs Poorly or Stalls Under Load"
If your Hobart starts but struggles under actual welding load.
- Air Filter: A partially clogged air filter might allow starting but restrict airflow under load.
- Fuel System:
- Fuel Filter: Partially clogged filter might pass enough fuel for idle but not for full power.
- Carburetor Adjustment/Clogging: Improperly adjusted or partially clogged carburetor jets can lean out the fuel mixture under load.
- Old Fuel: Stale fuel burns inefficiently.
- Spark Plug: A fouled or gapped spark plug can cause misfires and loss of power.
- Overload: Is the machine simply being pushed beyond its duty cycle or maximum output? Reduce the load or allow it to cool.
- Exhaust System: A partially blocked muffler or exhaust pipe can restrict exhaust flow and reduce engine power.
"Overheating"
The engine or generator gets excessively hot.
- Cooling Obstructions:
- Airflow: Ensure cooling fins on the engine and generator, as well as air intake and exhaust vents, are clear of dust, debris, or blockages.
- Fan: Check that the cooling fan is intact and spinning freely.
- Oil Level: Low engine oil can cause excessive friction and heat.
- Overload: Continuously running the machine at or above its maximum rated output can cause overheating. Respect the duty cycle.
- Engine Issues: Lean fuel mixture can cause the engine to run hotter.
"Excessive Smoke"
Smoke color tells a story about the engine.
- Blue Smoke: Indicates oil is burning. This could be worn piston rings, valve guides, or a crankcase breather issue. Low oil consumption might be tolerable, but heavy blue smoke needs attention.
- Black Smoke: Indicates an overly rich fuel mixture (too much fuel, not enough air). Check air filter, choke position, or carburetor adjustment.
- White Smoke: Often points to water vapor (especially in cold weather, which is normal until warm) or burning coolant (if applicable, though less common in small air-cooled engines). If persistent, it could be a head gasket issue.
"Strange Noises"
Listen carefully for where the noise is coming from.
- Knocking/Pinging: Usually indicates improper fuel octane, pre-ignition, or internal engine wear.
- Screeching/Squealing: Often a slipping belt (if applicable) or a failing bearing in the engine or generator.
- Rattling: Loose hardware, heat shields, or internal engine components.
"Electrical Shocks or Sparks"
This is a critical safety issue.
- IMMEDIATE SHUTDOWN.
- DO NOT OPERATE.
- This indicates a serious fault in the electrical insulation, grounding, or wiring. Inspect welding leads for damage. If you're unsure, professional help is necessary. Reviewing electrical safety when welding will reinforce best practices and the gravity of these symptoms.
Beyond Basic Repairs: When to Call the Pros
While much of the routine maintenance and basic troubleshooting can be handled by a diligent owner, there are times when professional intervention is not just recommended, but necessary.
- Complex Internal Engine Issues: If you suspect piston, rod, or crankshaft problems, or significant valve train damage, a certified small engine mechanic is your best bet.
- Major Electrical Faults: Issues within the generator windings, stator, or complex control board failures are specialized repairs that require specific diagnostic tools and expertise. An incorrect repair can be dangerous and costly.
- Warranty Concerns: If your Hobart is still under warranty, attempting major repairs yourself might void it. Consult your dealer or Hobart service center first.
- Safety Is Compromised: If you're dealing with persistent electrical shocks, major fuel leaks, or any issue that makes you feel unsafe operating the machine, get professional help.
Safety First, Always: Non-Negotiable Rules
Before, during, and after any maintenance or troubleshooting, safety must be your top priority.
- Disconnect Power: Always turn off the engine and disconnect spark plug wires (and battery terminals for electric start) before performing any work.
- Ventilation: Ensure adequate ventilation when working with fuel or operating the engine. Never run a welder generator in an enclosed space.
- Personal Protective Equipment (PPE): Wear appropriate gloves, eye protection, and sturdy footwear.
- Fire Extinguisher: Keep a suitable fire extinguisher (Class B for flammable liquids, Class C for electrical fires) nearby.
- Proper Grounding: Ensure the welder generator itself is properly grounded according to the manufacturer's instructions and local electrical codes.
- Cleanliness: Spilled fuel or oil creates fire and slip hazards. Clean them up immediately.
- Read the Manual: Your Hobart owner's manual contains specific safety warnings and operating instructions unique to your model. Read it cover to cover.
Optimizing Performance: Small Tweaks, Big Impact
It's not just about fixing what's broken; it's about making sure your Hobart runs as efficiently and powerfully as possible.
- Use the Right Fuel and Oil: This can't be stressed enough. Using the correct octane fuel and specified oil viscosity directly impacts engine health and efficiency.
- Keep It Clean: A clean machine cools more efficiently and is easier to inspect for issues. Regularly blow out cooling fins and vents.
- Monitor Gauges and Indicators: Pay attention to oil pressure, temperature, and voltage gauges (if equipped). They provide real-time feedback on your machine's health.
- Regular Load Testing: Occasionally run your welder generator at a significant load (e.g., a heavy welding pass) to ensure it performs as expected and to burn off any carbon buildup.
- Record Keeping: Keep a log of maintenance dates, oil changes, filter replacements, and any issues encountered. This helps predict future needs and troubleshoot recurring problems.
Your Hobart: A Long-Term Investment in Power
Your Hobart welder generator is a workhorse, a versatile tool that powers your projects and often, your livelihood. By embracing a proactive stance on maintenance and understanding the fundamentals of troubleshooting, you're not just preventing breakdowns—you're ensuring consistent performance, extending its operational life, and protecting a significant investment.
Regular checks, timely service, and a keen ear for unusual sounds will empower you to keep your Hobart running strong for years to come. Remember, a little attention now saves a lot of headaches (and dollars) down the road. Keep your tools sharp, your fuel fresh, and your arc steady.